
You’ve already got a LabArchives® notebook, so start adding your research to it!
When you signed up for LabArchives® you created your first LabArchives® notebook. Now it’s time to add your research to it:
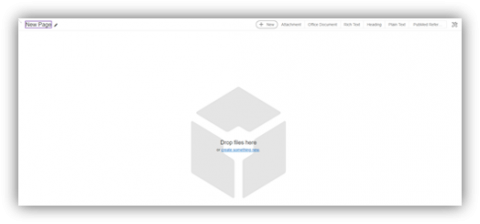
- Log in
- Drag and drop any file type or...
- Click create something new in the center of the page
- Select an entry type from the menu
- Step-by-step instructions: Add Data to your Notebook [HTML]
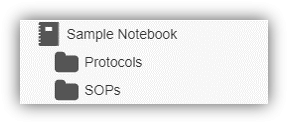
Organize your research into as many notebooks, folders, pages and entries as needed.
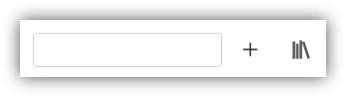
To add a new notebook simply click Notebooks in the top left corner and the + symbol.
- Step-by-step instructions: Create New Notebook [HTML]
Upload and organize data quickly in LabArchives®. Do better science, fast.
The quick AND secure way to to share data.
With LabArchives® you can share your data quickly AND securely with collaborators located in your lab or half a world away.
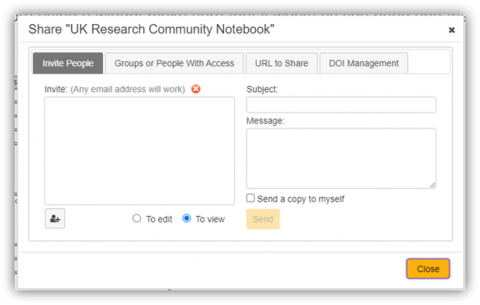
To share a notebook, folder or page:
- Right click on the notebook, folder or page
- Click share
- Add collaborator email addresses, select edit or view only rights and send
- Step-by-step instructions: Sharing Overview [HTML]
The collaborator will receive an email instructing them to set up a free account (if they aren’t already a LabArchives® user) which will enable them to access your work.
Collaborators can only access notebooks, folders and pages that YOU give them access to.
Do better science with collaborators around the globe.
Simple yet powerful data management tools.
You have access to thousands of research data management tools within LabArchives®. Here are four you can start using today.
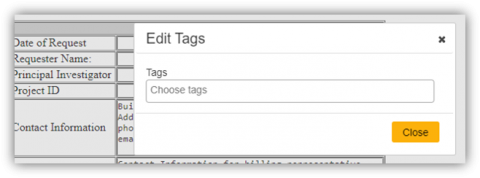
Organize data: Tags
Above any entry, click the ellipses and click Tags add a tag. Tags make it easy to find entries that relate to one another. To search your tag library head to the search bar...
- Step-by-step instructions: Tags [HTML]
Find data fast: Search
Search in one notebook or across all your notebooks, by users, tags, entry types, within date ranges or even by chemical structures.
- Step-by-step instructions: Advanced Search [HTML]
Step-by-step instructions: Search by Folder and Page [HTML]

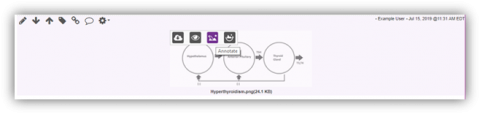
Add images: Image Annotator
Upload an image as an attachment. Hover over the uploaded image and click on the third icon that appears. Add text, shapes and drawings with the image annotator.
- Step-by-step instructions: Image Annotator [HTML]
Automate data upload: Folder Monitor
Upload files automatically from your equipment. Create upload rules to save time, stay organized and avoid file duplications.
- Step-by-step instructions: LabArchives® Folder Monitor for Windows [HTML]
- Step-by-step instructions: LabArchives® Folder Monitor for Mac [HTML]
Do better science with powerful features and functions.
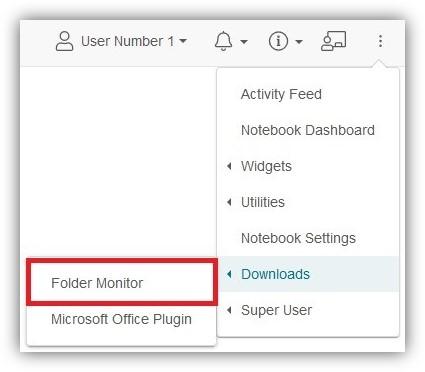
Where to find Folder Monitor after install.
If you have chosen to have Folder Monitor automatically open on startup, you will find the LabArchives® icon in your taskbar at the bottom of your screen. (This occurs when starting or restarting your computer.)

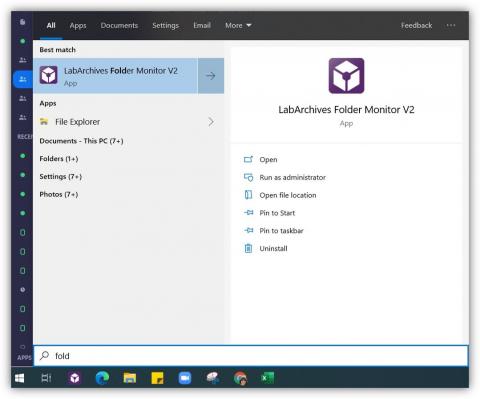
Windows:
If your Folder Monitor is not yet running, you can open it from your Start Menu.
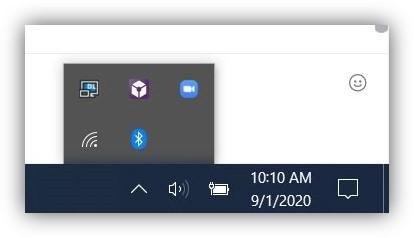
If Folder Monitor is already running on your computer, click your system tray on the bottom right and you can right click on the icon to select "Open LabArchives® Folder Monitor."
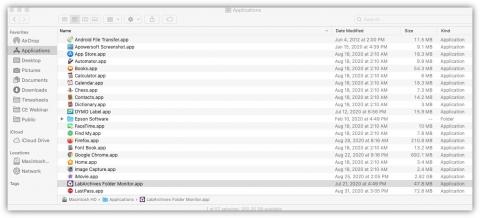
Mac:
It can vary a little bit on Mac but once it is installed, it should be available as an option in Finder.
Protect your data every step of the way.
Not only is LabArchives® the most used digital lab notebook, it’s also the most secure.
Every LabArchives® user’s data is:
- Encrypted in transit and at rest
- Synced regularly between a primary and disaster recovery data center
- Regularly backed up in multiple locations in encrypted form
- Stored only on LabArchives® servers isolated from other corporate servers
- Protected by redundant, industry standard firewalls and security devices
- Monitored for suspicious activity
Revision History
Documenting who did what research is crucial. In LabArchives®, revision history is recorded for every entry. To view this history simply hover over an entry, click the gear icon, click revisions. Immutable date and time stamps associated with each action ensure that attribution is clear in real time and years after publication.
- Step-by-step instructions: Revision History [HTML]

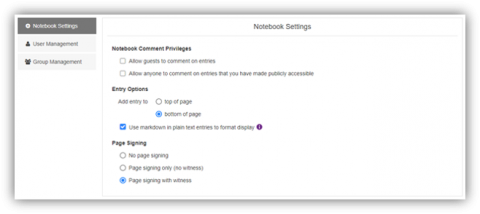
Page signing and witnessing
“Freeze” final results and disallow further changes with LabArchives® page signing and witnessing. Once a page has been signed no further edits can be made and no additional data can be added. A witness can reject a user's signature to unlock the page or witness the page to permanently freeze the page.
Example: A PI has created a Policy folder within his/her notebook and given access to his/her team members. To have a record that everyone has read the policies, he/she can create a copy of the policy for each team member and set user rights for that person to sign the page once if has been read.
- Step-by-step instructions: Sign a Page [HTML]
- Step-by-step instructions: Witness a Signed Page [HTML]
Do better, more secure science.
Here's what you want: reproducible data.
In a 2016 Nature study of 1576 researchers, 60% failed to reproduce their own findings.
If data can’t be replicated it’s not useful. So how can this all too common fate be avoided?
STANDARDIZED DOCUMENTATION
Sound scary? It’s not. Here’s a handful of strategies from our users:
- Create a LabArchives® folder where all Standard of Practice (SOP) documents live
- Store all supporting papers in a LabArchives® folder
- Build standard templates for regularly repeated experiments
- Decide on a standard naming convention for notebooks, folders, pages and entries
These are just a few strategies that will help keep you and your collaborators on track.
To learn more about LabArchives® users achieving reproducibility check out these blog articles:
UNC HIV Cure Center: a collaborative approach
Ligar: Polymer Development + Securing Intellectual Property
Collaborate quickly and seamlessly, within your lab or across the globe.
There are thousands of ways to collaborate around research data within LabArchives®. Here are three powerful collaboration tools you can start using today.
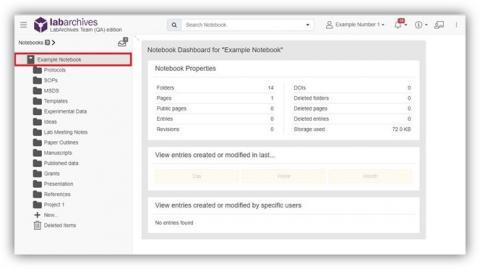
Notebook Dashboard
Get a one-click, high level overview of activity in your notebook. To access, click the notebook icon in the left hand menu. View entries from the last day, week or month and sort by user.
- Step-by-step instructions: Notebook Dashboard [HTML]
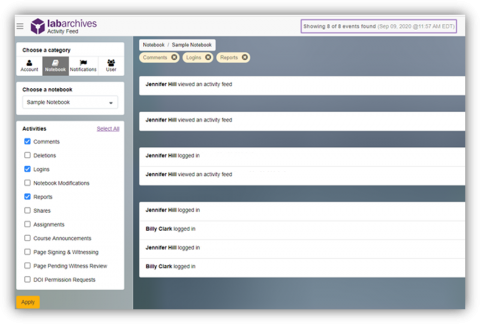
Activity Feed
Head to the Activity Feed to get an in-depth look at who is doing what in your notebooks at any given time.
- Step-by-step instructions: Activity Feed [HTML]
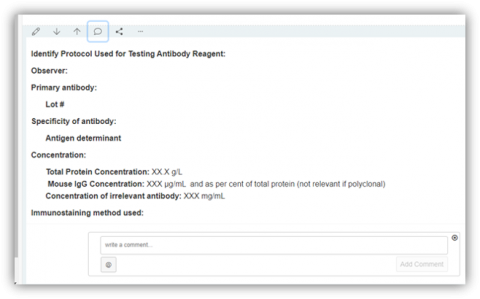
Comments
Draw a collaborator’s attention to an entry. Simply hover over any entry and click the speech bubble icon. Type @, select your collaborators name from the drop down and leave your comment.
Important note: Unlike an actual entry (such as text, images or any type of attachments), comments are not a permanent part of the notebook. These can be added, edited, and deleted at any time without it being logged in the revision history. Once deleted, a comment cannot be retrieved.
- Step-by-step instructions: Comments and Mentions [HTML]
Do better science with streamlined, simple and global collaboration.
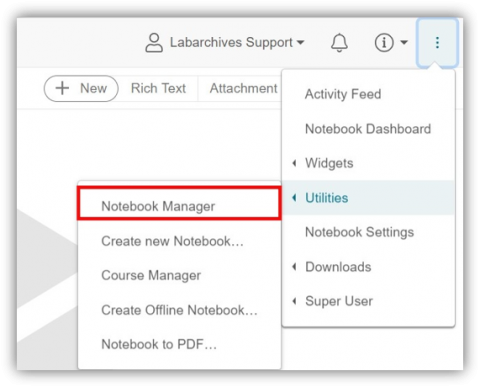
Notebook Manager
The Notebook Manager allows you to organize all the Notebooks to which you have access. In the Notebook Manager, you can choose which Notebooks will and will not appear in the Notebook Navigator. You can also remove yourself from a Notebook, or delete a Notebook you own. Lastly, you can clone any Notebook that you own.
- Step-by-step instructions: Notebook Manager [HTML]
To access Notebook Manager, click the triple-dot icon as shown below:
Or click the |||\ icon above your notebooks:
Choose how you want to manage your notebooks!
User Management
User Management allows you to add and manage users for the entire notebook. The Owner and Administrator can access this feature. To access this feature, click the triple bar icon in the top right and select "Notebook Settings".
- Step-by-step instructions: Managing Users in a Notebook [HTML]
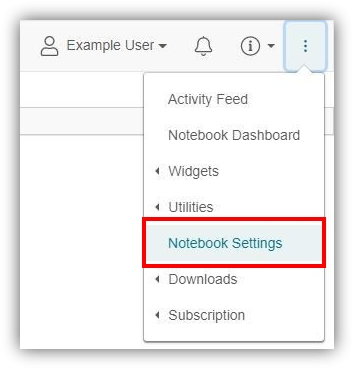
Click on the second tab, "User Management".
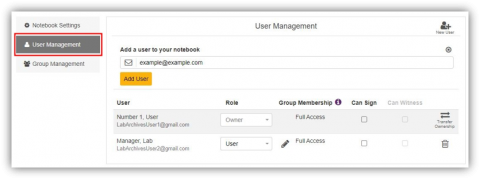
Control who has what level of access to your notebook!
Need to manage your Miscrosoft Office files?
LabArchives® includes Microsoft Office Online to create, view, and edit Word, Excel and PowerPoint documents.
-
Step-by-step instructions: Office Documents [HTML]
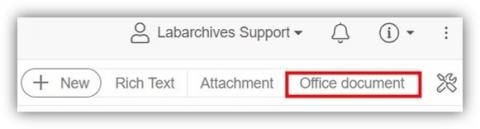
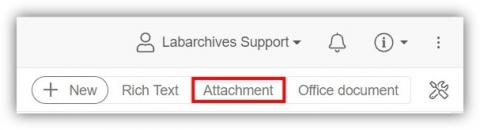
To create a new Office Document
1. Select "Office Document" on the "Add Entry" toolbar.
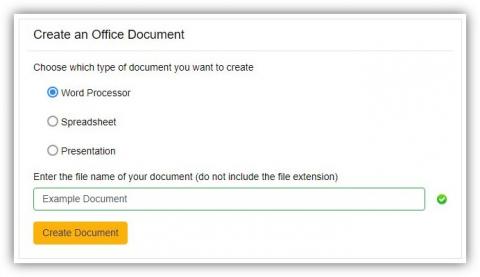
2. Select the document type you would like to create, enter a name for the document and click "Create your Office Document"
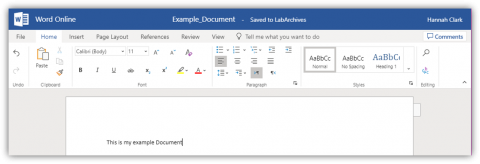
3. Work in your document. Microsoft Office Online will automatically save your changes. Close the tab to see your changes in LabArchives®.
Or use the Microsoft Office Plugin! [Windows][Mac]
Want to attach something to your page?
LabArchives allows you to attach documents of any file type to a page of your notebook. You can add attachments to your lab notebook by dragging and dropping onto your page, manually uploading to the page, or through an application like Folder Monitor, the Microsoft Office Plugin, Graph Pad Prism, and more.
-
Step-by-step instructions: Attachments [HTML]
Drag and Drop
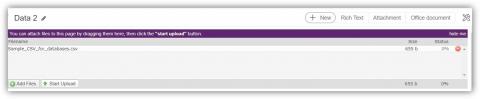
Entry Toolbar
Add your attachments with ease!
Realized you made a mistake on an entry or document?
Once you add data to your notebook, you can edit that item directly within LabArchives®.
If you have edit rights to an entry, you will see entry toolbar when you hover your mouse over that entry. You can edit an entry by double-clicking or by selecting the pencil Icon. When you finish editing an entry be sure to click "Save to Page."
-
Step-by-step instructions: Edit your Notebook [HTML]
Edit your research directly in LabArchives!
Linking Your Data
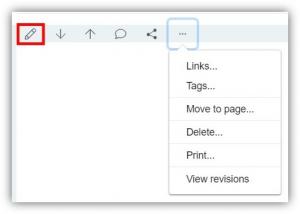
The linking tool allows you to link an entry in your notebook to other entries, pages, or external websites. These links can be used to refer to other data or to link to a specific version of a protocol when trying to ensure the reproducibility of your experiments. To create a link, hover your mouse over an entry and click the three dots, followed by the Links option. When a link is created for an entry, it will appear on the top right of the entry when you hover over the linking icon.
- Step-by-step instructions: Linking [HTML]

Easily create a link to websites, data within your notebook,
or data in another notebook!
How do I copy a template from another notebook to my notebook?
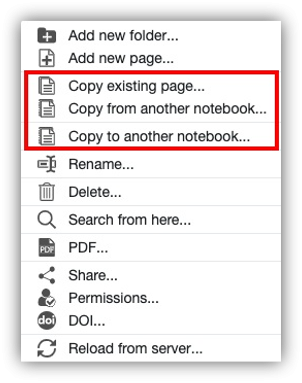
LabArchives® offers four ways to copy pre-existing content. These are Copy from Existing Page, Copy from Another Notebook, and Copy To Another Notebook and Copy Entry.
-
Step-by-step instructions: Copy Existing Pages and Notebooks [HTML]
Copy from Existing Page, Copy from Another Notebook, and Copy to Another Notebook can be accessed by clicking “+New” or by right clicking on any page or folder.
Copy items easily from notebooks/pages that you have access!